Posts

Residential interior painting, Residential exterior painter, Atlanta, Sandy Springs, Brookhaven, Dunwoody, Buckhead, Roswell, Alpharetta

GreenWave Solutions Now Offering Roswell House Painting

During the past few years, GreenWave Solutions has performed most of our professional painting and drywall services in Atlanta, Buckhead, Brookhaven and Sandy Springs.  We have started to outgrow the perimeter and are now offering our house painting and residential drywall contracting in Roswell, GA.

Roswell is a suburb about 10 miles north of I-285.  Roswell has a nice blend of new and old homes.  Like much of metro Atlanta, Roswell is growing as people continue spreading into the suburbs.

GreenWave Solutions wants everyone in Roswell to know that we are now offering our professional house painting services in Roswell.  So whether you want to update the colors in your old home or have a new house and want to upgrade the cheap builder paint, our professional house painters are here to help.

We specialize in interior painting, exterior painting, pressure washing, deck staining, deck sealing, cabinet finishing, cabinet refinishing, drywall repair, drywall installation, popcorn ceiling texture removal, stippled ceiling texture smoothing, carpentry, rotten wood replacement and more!

In order to help expand into Roswell, GA faster, GreenWave Solutions will offer clients in Roswell 15% off any painting or drywall project that is over $2000.

Call GreenWave Solutions today to schedule your free estimate and see why we’re one of the best painting contractors in Atlanta.  404-549-7776

GreenWave Solutions is Atlanta’s first green painting contractor.  We proudly serve Atlanta, Brookhaven, Buckhead, Chamblee, Dunwoody, Inman Park, Grant Park, Ansley Park, Midtown, Morningside, Virginia Highlands, Vinings, Roswell and more.

Call us today to see if we offer our professional services in your area.

Interior house painting in Roswell, Exterior Painter Roswell

Pros and Cons of Painting with Dark Colors

When I do both paint estimates and color consultations, I find that many people are intimidated by dark colors.  I understand that dark colors may seem scary because of all the things you hear people say about them –

“They make rooms look small”

“They can make rooms too dark”

“You have to use too many coats and it’s too hard”

“They are hard to match”

These are reasons I hear people use for not wanting to use dark colors when painting.

While all of these statements can be true, they are not always true.  If you know when, where, and how to use dark colors you can enjoy the beauty and benefits of them.

Dark colors are cool because they are more bold and expressive than lighter ones.  They are, however, more difficult to use.  No pain, no gain, right?  Let’s discuss how to minimize the pain.

First off, painting is not permanent.  You aren’t choosing a tacky spring break tattoo, you choosing a paint color.  Worst case scenario, you have to repaint.  So the stakes aren’t really that high.

Now that we have everything in perspective and no one is worried about destroying their house with a dark color, let’s discuss places where dark colors can always work.

  • Powder Rooms – Who cares if it’s dark in a powder room?  It is supposed to be tranquil and serene.  And I am leery of anyone who needs a ton of light for whatever they’re doing in there.
  • Dining rooms – Dark colors like reds and blues can evoke hunger or passion.  That is why they can work really well in dining rooms and…
  • Bed Rooms – Bed rooms can be tricky.  If your bed room doubles as a work space or family area, then you probably should stay neutral.  But if you have large or private bed room, dark colors are conducive to bed room activities.
  • Libraries – Not all homes have libraries or studies, but if you do have one, then you should explore dark colors when painting them.  These rooms usually will have judges paneling or wainscoting which can add to the beauty of these areas.

Now that you know where dark colors are appropriate to use, we will discuss when to use them.

Whenever you want.  That is the beauty of painting in your home – you can do whatever you want.  It looks good if you like it, Shallow Hal!

I want to address the limitations of dark colors.  These are the cons of using dark colors:

  • They don’t touch up.
  • They show wall imperfections, lap marks, and bad drywall finishing much more than light colors.

These limitations are real.  If you have kids or animals that are going to abuse the wall, then I don’t recommend dark colors.  If you have poorly hung or finished drywall, I don’t recommend dark colors.

Now that you know a little bit more about dark colors, I hope that you are feeling bold and ready to make a room in your house look like a magazine picture.

I do have one trick up my sleeve that makes using dark colors easier.  Sherwin Williams’ Color To Go quarts.  For $5, you can get a quart of sample paint in any color of the rainbow.  Buy these and use them.  Also, look at the color during morning, afternoon, and night.  Dark colors can change their appearance based upon natural light, artificial light, and shadows.

GreenWave Solutions offers color consultations and interior painters in Roswell.  We are offering Roswell house painting specials so call today to schedule your estimate when you need a Roswell painter – 404-549-7776.  We also serve Atlanta and its affluent suburbs.

By 

GreenWave Solutions – Simply the best painters in Atlanta

Interior & Exterior Painting Services Atlanta, Alpharetta, Dunwoody, Chamblee, Roswell, Buckhead, Sandy Springs

How To Paint a Bath

Bathrooms are some of the more fun places to paint.  They are small and you can usually get creative with colors because of this.  However, the one factor that you must account for when painting your bathroom is water.

Bathrooms are exposed to lots of water, steam, and traffic.  For this, you must take care when selecting bathroom paint.  Since GreenWave Solutions has the best Atlanta painters, we use the best paint.  Our professional choice is Sherwin-Williams’ Duration Home Matte Finish.  This product is washable, scrubable, and water and mildew resistant.  The resins in Duration are very resistant to peeling when exposed to shower steam or water splashing from the sinks.  After you have selected your paint and color, here is what you need to paint your bathroom like our Atlanta Painting pros:

–          Brushes and rollers

–          Roller trays

–          Drop cloths

–          Drywall repair product and knife

–          Tape

–          Tools to remove the back of the toilet

–          Alkyd based aerosol primer (maybe)

–          Caulk (maybe)

Here we go:

1)      Repair any drywall damage (gouges, scratches, etc) and caulk everything (if necessary).

2)      After drywall compound has dried, sand repairs smooth and prime with oil primer.  During this step, prime and water stains that are around using the same primer.

3)      Remove switch plates and outlet covers, tape around towel racks, light fixtures, ceilings and anything else you don’t want to get paint on (unless you are good enough to cut a line without tape).

4)      Start painting.  I like to do the trim first (see #5) and then the walls.  Use your brush to cut and roll the big areas.  If you want to, you can remove the back of the toilet so that you can paint the whole area.  However, using a brush, you can paint behind it enough so that it looks completely painted.  I don’t like removing the back of the commode because it sucks and isn’t really necessary.

5)      Atlanta painting pro tip:  If you are not using tape, paint the trim first.  This way, it doesn’t matter if you get paint on the wall because it is easier to cut a straight line on the wall than on the trim.

6)      Let the paint dry for 30 minutes or so, remove the tape, and do a walkthrough.  Walkthrough refers to checking for missed spots, holidays, etc.

7)      Clean up and get some beer to reward yourself!

This Roswell painting How-to is brought to you by GreenWave Solutions.

By 

President of GreenWave Solutions, the best Atlanta painter and Dunwoody house painters.  GreenWave Solutions offers painter services in Alpharetta, Atlanta, Decatur, Sandy Springs, Roswell, Brookhaven, Duluth, Grant Park, Inman Park, Buckhead,Milton, Midtown, and more!

Primers are important to professional painting companies, interior painters, exterior painting.

What is the Purpose of Primers?

If you have ever been into a paint store you probably heard something about primers.  Whether you were asking about how to paint something or reading informational pamphlets, you learned that primers are important.  When talking to clients, I realize that “normal” people don’t know the exact definition of primers.  This article will help correct that.

What does a primer do?

Prepares a substrate to accept a top coat.

This is a short but vague answer.  A better answer is extrapolated when another question is asked.

What do you need the primer to do?

Answering this question will better define for what primers are used.  There are many different types of primers, each having a different purpose.  Here are some common applications for primers.

  • Promoting adhesion – This is important when painting hard, glossy surfaces like glass, plastic, metal, or porcelain.  If you painted directly on these surfaces, the paint would scrape off.  Bonding primers make these surfaces paintable.
  • Sealing stains – Painting over water, smoke or oil stains requires priming to prevent the stains from bleeding through the paint.
  • Sealing wood – In order to prevent tannin and knots to bleed through paint, you must prime raw wood.
  • Changing colors – When making drastic color changes, priming can save a coat or two of paint.
  • Smoothing substrates – Extremely rough and porous surfaces, like cinder blocks, are primed with a very thick coating so that the paint has an even surface.
  • Equalizing porosity – Primers are used to create a uniform porosity so that paints will have a uniform finish.  An example of this new drywall.  The drywall, tape, and finishing compound all have different porosity and require  priming if using a non-flat paint.
  • Preventing/Re-mediating rust  – There are primers that prevent rust on ferrous metals and others that reform rust into an inert metal.
  • Industrial applications – There are numerous specialty primers used for industrial painting applications.  These uses are too specific and technical for the purposes of this article.  If you have questions using these primers, you need to read the manufacturer specifications.

This concludes primers 101.  If you have more questions, email us using our contact form.

By

President of GreenWave Solutions, Atlanta’s painting company and house painters.  GreenWave Solutions offers the best painter services in Alpharetta, Atlanta, Dunwoody, Sandy Springs, Roswell, Brookhaven, Duluth, Grant Park, Inman Park, Buckhead, Midtown, and many more!  We offer house painting in Johns Creek.

We are the best painters in Atlanta.

House Painting, Painters in Atlanta, Alpharetta, Chamblee, Dunwoody, Roswell, Buckhead, Sandy Springs

What are VOCs in Paints?

Intelligent people agree that global warming is real.  While its exact causes are unknown, scientists say that greenhouse gases are contributing to it.  Whether or not greenhouse gases are causing global warming, we can all agree that they are bad for us to breathe.  The chief cause of greenhouse gases are volatile organic compounds (VOC).

These compounds are organic chemicals with low boiling points.  Because of the low boiling temperatures, these chemicals convert into a gaseous state in normal conditions.  They typically are toxic and flammable.

Here is an everyday example of what this means.  Water has 3 states; solid, liquid, and gas (please don’t comment about plasma).  Water is solid at 0 C and below, liquid between 0-100 C, and gas at 100 C and above.

Instead of water, let’s look at toluene.

Instead of the vapor pressure of 100 C, toluene’s is 25 C.  This is cooler than room temperature.  Because of this a bucket of toluene will emit vapors in cool temperatures.  Unlike water, these vapors are toxic to humans, animals, plants, and the ozone layer.  Toluene is a solvent common to many industrial coatings and epoxies.

Why are the VOCs in paint?

Paints contain VOCs because of the chemicals that act as the paints solvent.  Solvents keep paint in liquid form until you use it.  That is why paint smells while it is drying and then stops smelling.  The fumes come from the solvents leaving the paint.

The reason that so many paints use toxic solvents is because that is all that technology had allowed for a long time.  Paints that used water as a solvent, like acrylics and latex, were not so durable as paints that used MEK, lacquer, and stronger chemicals as solvents.  This is just one of those “life isn’t fair” things like “why is the most delicious food the least healthy?”  God has a twisted sense of humor, I guess.

The good news is that scientific advances have made acrylic resins compete as good as their more toxic counterparts’.  By replacing the resin package, scientists are able to make awesome paints that use water as the solvent.  That is how paint manufacturers develop “0-VOC” paints that perform better than VOC heavy coatings.

Thanks science!

By

President of GreenWave Solutions, Atlanta’s first and best green painting company.  GreenWave Solutions offers the best painter services in Alpharetta, Atlanta, Dunwoody, Sandy Springs, Roswell, Brookhaven, Duluth, Grant Park, Inman Park, Buckhead, Midtown, and many more!

Ceiling texture removal, Atlanta Painting Company, House Painters, Atlanta, Alpharetta, Sandy Springs, Dunwoody, Brookhaven, Buckhead, Roswell, Marietta, Milton, Decatur

How to Smooth a Popcorn Ceiling

Today’s Article is going to tackle one of the more tedious projects with which homeowners face:  Removing popcorn or stipple texture from a ceiling.

This is not a difficult process. It is, however, extremely messy, labor intensive, and tedious. It also requires good finishing skills for professional results. I am going to make this a step by step explanation.Gather all of your materials and supplies:

1. Gather your materials and supplies.

  • spray bottle with water
  • scrapers
  • plastic and construction paper
  • sand paper and poles
  • trash bags
  • dust masks
  • eye protection
  • paint brushes
  • drywall compound
  • finishing knives
  • paint

2.  Prepare the area.

This is going to be a dusty, messy process so proper preparation is imperative.  Move all the furniture out of the room or into the center of the room.  If the furniture stays in the room, cover it with plastic and tape the plastic.  Cover all floors with plastic or construction paper.  Also, cover A/C intakes or turn of the HVAC altogether.  The drywall dust is so fine it will go into the ventilation and get spread throughout the building.

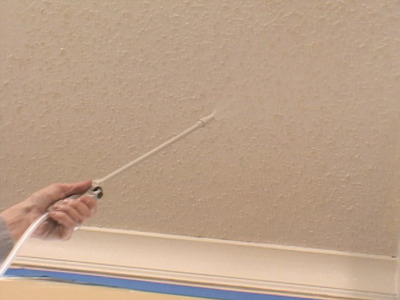
3. Start removing the texture.

Both stipple and popcorn texture are water based products.  The easiest way to remove them from your ceiling is by spraying them with warm water and letting the water seep into the texture.  After a few minutes, the texture should be soft enough to be scraped off.  How easily the texture comes off depends on many variable and can’t be accurately determined until you start scraping.  Continue removing the texture as described about until it is all gone.  You are done for the day.  Let the ceiling dry and get some rest because your neck and shoulders are probably sore.

4.  Refinish the ceiling.

This takes some skill.  There is no doubt that the ceiling looks like it needs help.  Get your drywall compound and finishing knives ready.  I recommend buying a 5 gallon pail of joint compound or the bag mix so that you can make as much as you need.  Now that you have your finishing tools ready start refinishing the ceiling.  Remember that the less compound you use, the less sanding and dust you will have to deal with in step 5.  After you have finished applying drywall compound on the ceiling, take lunch and give the compound time to dry.  Dry time depends on temperature, humidity, and the type of compound you used.  I recommend 45 minute compound.

5.  Sanding and touch up.

Now comes the really messy part.  Put on your dust mask and eye protection.  Sand the entire ceiling until it is smooth.  If there are areas that don’t look right, touch them up with more compound and re-sand it after it dries.  Once you have the ceiling smooth, dust it with a damp rag or paint brush to get the loose dust off of it before step 6.
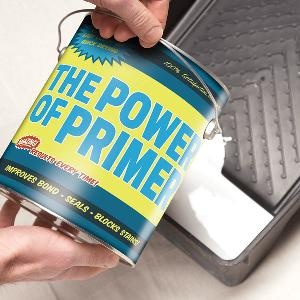
6.  Prime and paint.

You’re almost done!  I know that step 6 says, “Prime and paint”, but you may not have to prime.  If you are using flat paint, which I recommend on ceilings, then you can paint directly on the finished ceiling.  If there are water stains, then they do need to be primed using an alkyd or shellac primer/sealer.  After the paint dries, do a walk through and address any areas that need to be touched up.  If everything looks good, then proceed to the last step.

7.  Clean up.

This should be a welcome step by now.  Clean up all of the plastic and paper, put the furniture back and enjoy your nice smooth ceiling.  Hooray!

If you just got through smoothing a textured ceiling you are probably thinking, “I am never going to do that again.  Next time I am going to hire a professional.”

That’s when you call GreenWave Solutions.  We are Metro Atlanta’s best painting company.  We serve Atlanta, Alpharetta, Brookhaven, Buckhead, Chamblee, Cumming, Duluth, Dunwoody, Doraville, Grant Park, Inman Park, Milton, John’s Creek, Sandy Springs and more.  Call us for the best interior painters in Alpharetta!

Simply put, GreenWave Solutions has the best painters in Atlanta.

By: Daniel Macris, President of GreenWave Solutions, the best house painters in Atlanta.

Connect with